Sicherheit & Datenschutz
Einleitung
UMS stellt Medien auf zwei Arten zur Verfügung: über DLNA/UPnP für den Konsum über Media-Player-Anwendungen und über HTTP(S) für den Konsum über Webbrowser.
Web-Browser haben eine einfache Sicherheits- und Datenschutzkontrolle, indem sie Benutzerkonten mit Logins haben.
Media-Player-Apps unterstützen im Allgemeinen nicht das Konzept eines "Benutzers", so dass normalerweise jedes Gerät den gleichen Inhalt erhält. Das ist vielleicht nicht das, was Sie wollen. Wenn Sie zum Beispiel zwei Ordner kids_sicher und kids_unsicher haben, möchten Sie eventuell, dass die Renderer im Kinderzimmer nur Zugriff auf den kids_sicher Ordner haben. Eine andere häufiger vorkommende Situation ist, dass Sie im selben Netzwerk sind wie Leute, die üblicherweise keinen Zugriff auf Ihre Medien haben sollen, wie Mitbewohner. Daher möchten man bestimmte Renderer komplett blockieren.
UMS bietet eine Reihe von Methoden zur Kontrolle des Zugriffs.
Renderer oder Netzwerkgeräte standardmäßig erlauben oder blockieren
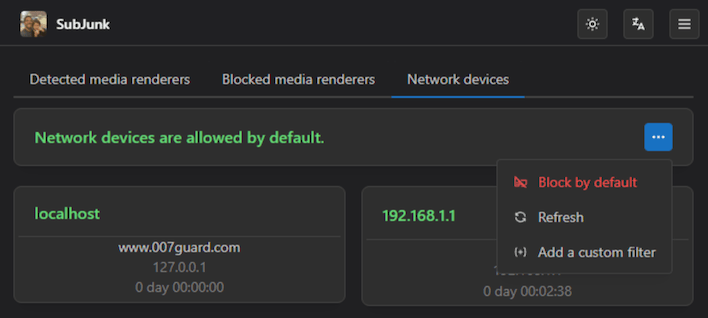
Sie können die Standardstrategie für Renderer und Netzwerkgeräte auswählen. Sie können standardmäßig mit Verbots- und Erlaubnis-Listen die vollständige Kontrolle erlauben oder verweigern.
Dies ist nützlich für gemeinsam genutzte Lebenssituationen oder ausgedehnte/wenig vertrauenswürdige lokale Netzwerke. Es ist auch für diejenigen von Ihnen nützlich, die Powerline-Adapter für Ihr Netzwerk verwenden, da dies zu unerwünschten Zugriff von Nachbarn führen kann.


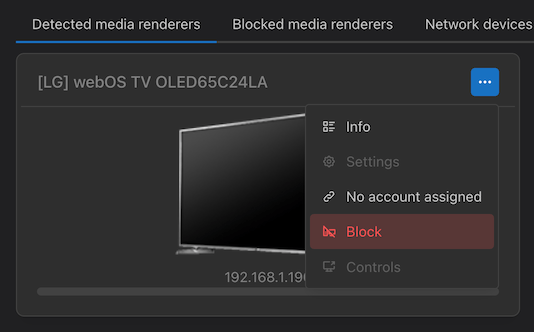
Renderer und Netzwerkgeräte blockieren/zulassen
Wenn Sie ausgewählt haben, dass Sie unbekannte Renderer erlauben oder blockieren möchten, können Sie Ihre Verbots- oder Erlaubnis-Liste vom Startbildschirm aus im Einstellungsbereich erstellen.

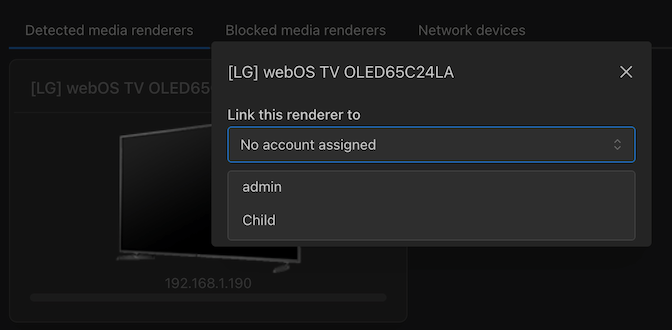
Person mit Renderer verknüpfen
Sie können die Benutzerkonten mit Renderern/Wiedergabegeräten verknüpfen, damit diese einen geräteunabhängigen Zugriff und Abspielmöglichkeiten auf die Inhalte haben.
Ein einfaches Beispiel: Wenn sie einen Fernseher im Wohnzimmer haben und einen in ihrem Schlafzimmer, dann können diese unabhängig voneinander unterschiedliche Inhalte wiedergeben.

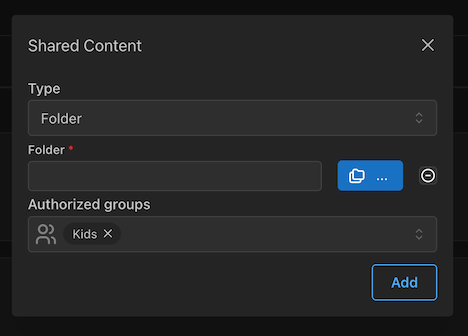
Freigegebene Inhalte auf bestimmte Gruppen beschränken
Sie können wählen, welche Gruppe welche Inhalte sehen kann (Einschränkung auf Verzeichnisse oder Online Inhalte). Wenn Sie z. B. eine Person haben (oder ein Gerät, das einer Person zugeordnet ist), die ein Kind ist, können Sie das Kind der Gruppe "Kinder" zuordnen und dieser Gruppe Zugriff auf das Verzeichnis "Familie", aber nicht auf die Inhalte "Horror" oder "Nur für Erwachsene" geben. Or give them access to the Kurzgesagt web feed, but not the history podcasts.

Ordner verstecken
Steuert die Sichtbarkeit von virtuellen Verzeichnissen Diese Konfiguration findet sich in dem UMS.conf File. Wenn sie bestimmte Verzeichnisse ausblenden wollen, damit sie nicht durchsucht werden können, setzen Sie den Wert an dieser Stelle auf "true" oder markieren Sie diese auf der Registerkarte Navigation/Freigabeeinstellungen im erweiterten GUI-Modus.
hide_recently_played_folder =true
hide_new_media_folder =true
hide_video_settings =true
hide_transcode_folder =true
hide_empty_folders =true
hide_media_library_folder =true
hide_live_subtitles_folder =true
Um den Web-Ordner auszublenden, müssen Sie auf der Registerkarte "Allgemeine Konfiguration" im erweiterten GUI-Modus die Option "Externes Netzwerk aktivieren" deaktivieren oder den Wert von "external_netweork =" in der Datei UMS.conf auf "false" ändern. Dies hat den Nebeneffekt, dass der automatische Updater nicht mehr funktioniert. Die über die grafische Benutzeroberfläche vorgenommene(n) Änderung(en) werden erst nach einem Neustart wirksam.
PIN Code
Alle oben genannten Methoden schränken den Zugriff von verschiedenen Wiedergabegeräten/Renderern ein. Wenn Sie jedoch Zugriff auf ein Wiedergabegerät/Renderer haben, der einen Ordner sehen darf, helfen Ihnen diese Methoden nicht weiter (wenn die Kinder Zugriff auf den Fernseher im Wohnzimmer haben, der Zugriff auf alle Medien hat, haben sie auch Zugriff auf diese Medien). Der PIN-Code löst dieses Problem. Er ermöglicht es Ihnen, Ordner/Medien hinter einem PIN-Code zu verstecken, den Sie VOR der Wiedergabe eingeben müssen. Als Standard handelt es sich bei der Eingabe um eine Ziffernfolge (0-9), genau wie bei einem Bankomaten. Ich empfehle Ihnen dringend, auf Ziffern basierende Codes zu verwenden, da es sonst schwierig wird, sie vom Renderer aus einzugeben. Sollten Sie besonders sicherheitsaffin sein, können Sie auch Buchstaben eingeben. Das funktioniert wie folgt: Fügen Sie eine Datei namens UMS.code in dasselbe Verzeichnis wie Ihre UMS.conf ein und fügen Sie in diese Datei "regexp,code" ein, wobei "regexp" ein regulärer Ausdruck wie in der Datei "UMS.deny" ist und "code" der Code ist, welcehr den Zugriff auf den Ordner/das Medium gewährt. Für den Code gibt es keine Längenvorschrift. Ein Beispiel:
.*privat.*,1234
Diese Konfiguration zwingt Sie zur Eingabe eines Codes, wenn der Ordner/das Medium das Wort "privat" enthält. Der richtige Code ist 1234. Der Code bleibt dann 4 Stunden lang gültig (wenn Sie ihn in dieser Zeit nicht ändern).
Benutzerdefinierte Gerätekonfiguration
Jede Konfiguration kann auch auf Gerätebasis festgelegt werden, indem eine benutzerdefinierte Gerätekonfiguration erstellt wird, die die Standard-UMS-Einstellungen außer Kraft setzt (weitere Informationen finden Sie unter "Erstellen einer benutzerdefinierten Gerätekonfiguration").
Als Beispiel: eine spezifische Konfiguration für den Fernseher der Kinder:
- Klicken Sie auf die Schaltfläche 'Dieses Gerät anpassen' oben rechts im GUI-Popup des Renderers und geben Sie einen Namen für die Konfiguration an.
- In der neuen conf-Datei, die sich öffnet, fügen Sie alle Einstellungen hinzu, die Sie für den TV überschreiben möchten., z.B. um den Servernamen zu ändern und verschiedene Ordner anzugeben:
#--------------------------------------------------------------------------------------------
# Benutzerdefiniertes Geräteprofil
# Siehe DefaultRenderer.conf für Beschreibungen aller möglichen Renderer-Optionen
# und UMS.conf für Programmoptionen.

# Die Einstellungen in dieser Datei überschreiben die Standardeinstellungen für das/die unten aufgeführte(n) spezielle(n) Sony Bravia EX-Gerät(e) .
# Geben Sie Geräte durch uuid an  (oder Adresse, wenn keine uuid), durch Kommas getrennt, wenn es mehrere Geräte sind.

device = uuid:7744ff6c-541f-48a8-0878-05fdebf240db
server_name = Kid Stuff
folders = c:\kids\stuff, c:\kids\otherstuff